"Capturing Brilliance: From Renaissance Masters to Modern Photography"

A Short History of Lighting and Art:
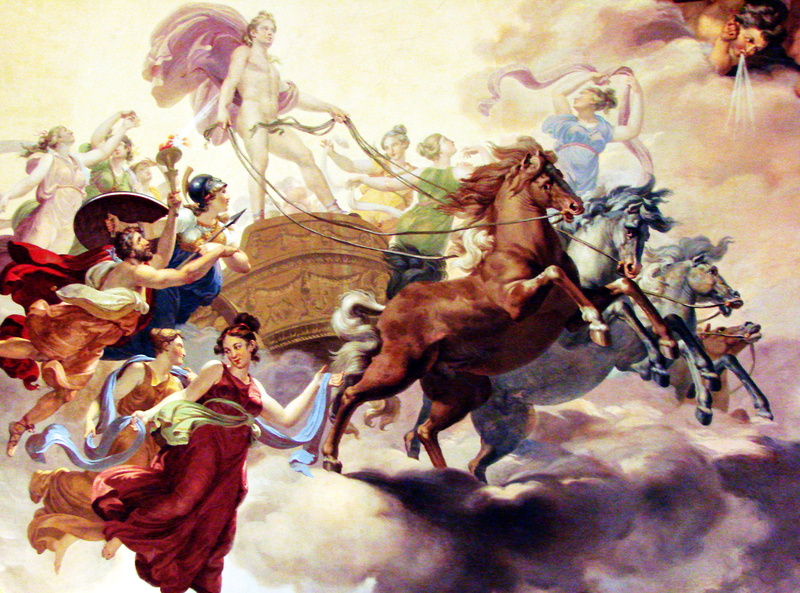
Within the mesmerizing origins of artistic illumination, the ingenious masters of the Renaissance emerged, wielding light's dynamic energy to revolutionize the very essence of visual storytelling. The Renaissance, a period of profound cultural and artistic rebirth spanning the 14th to the 17th century, saw a dramatic shift in how painters approached their craft. Among the first to embrace the transformative potential of light were the masterful artists of the Italian Renaissance, who deftly wielded light as a tool to evoke emotion, depth, and realism in their work.
Giotto di Bondone was one of the earliest and most influential Renaissance painters to harness the power of light (c. 1267-1337). While Giotto's approach to lighting was still relatively simple compared to later Renaissance masters, his work marked a significant departure from the flat, stylized compositions of the Gothic period. By introducing directional light sources and more natural shading, Giotto laid the groundwork for the evolution of lighting techniques in Western art.
However, during the High Renaissance, the true potential of light in painting began to be fully realized. Artists like Leonardo da Vinci (1452-1519), Michelangelo Buonarroti (1475-1564), and Raphael Sanzio (1483-1520) elevated the use of light to an art form in itself, employing innovative techniques to create depth, atmosphere, and emotional resonance in their work.
Leonardo da Vinci, in particular, was a master of light and shadow. He pioneered the technique of sfumato, which involves the subtle blending of light and shadow to create a soft, smoky effect, imbuing his subjects with a lifelike, three-dimensional quality. His iconic painting, the Mona Lisa, exemplifies the skillful use of sfumato, as the play of light and shadow across her face creates an enigmatic, almost ethereal expression.
Meanwhile, Michelangelo's mastery of light can be seen in his frescoes adorning the ceiling of the Sistine Chapel. Through the skillful manipulation of light and shadow, Michelangelo imbued his figures with a sense of depth, volume, and movement, which had never been seen before in fresco painting. As a result, his work on the Sistine Chapel remains one of the best examples demonstrating the immense power of light to bring a composition to life.
Another key figure in developing lighting techniques during the Renaissance was the Baroque painter Caravaggio (1571-1610). Caravaggio was renowned for his dramatic use of light and shadow, known as chiaroscuro. He often employed a single, intense light source to create detailed contrasts between light and dark areas within his compositions, lending his subjects a sense of drama and emotional intensity. Caravaggio's innovative approach to lighting would inspire generations of painters, leaving an indelible mark on the history of art.
Early photographers explored the intertwined relationship between light and photography. The art and science of capturing
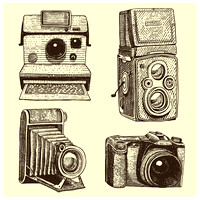 images have come a long way since its inception, but the magic of light remains at the heart of every photograph. We will delve into the early history of photography, from the humble beginnings of the camera obscura to the evolution of artificial light in photography.
The camera obscura, Latin for "dark chamber," was the predecessor of the modern camera. It was a simple optical device that projected an inverted image of the external world onto a surface inside a darkened room or box. The basic principle relied on light traveling in straight lines, passing through a small hole or aperture, and forming an image on the opposite surface. This fascinating phenomenon, documented by philosophers and scientists such as Aristotle, Mozi, Alhazen, and Leonardo da Vinci, laid the foundation for the invention of photography.
The first permanent photograph was captured by Joseph Nicéphore Niépce in 1826 using a camera obscura and a chemically treated pewter plate. When exposed to light, the plate formed an image that marked the beginning of a new era in visual representation. Louis Daguerre further refined this process, developing the daguerreotype, which used silver-coated copper plates and required shorter exposure times. In these early stages, natural sunlight was the only light source for photography.
As photography advanced, the need for controlled and consistent lighting became apparent. This necessity led to the developing and incorporation of artificial light sources into the photographic process. The limelight was the first artificial light used in photography, created by heating a piece of limestone with an oxyhydrogen flame. Though yet to be portable, the limelight provided a stable and controllable light source for early photographers.
In the 1860s, the invention of magnesium flash powder offered a portable and instantaneous source of light. Photographers would ignite a small amount of magnesium powder, producing a bright flash that illuminated the scene briefly, which allowed for the capture of indoor scenes, nighttime shots, and faster exposure times. However, using magnesium flash powder was cumbersome and hazardous and was soon replaced by the flashbulb, which was safer and more practical.
The introduction of electric lighting further revolutionized photography, allowing photographers to experiment with various artificial light sources and techniques. Continuous light sources like incandescent and fluorescent bulbs could fine-tune lighting setups and create specific moods and effects. In addition, electronic flash, or strobe lighting, gave photographers even more control over light, enabling them to freeze motion and capture high-speed events.
The Modern Camera and Light:
A digital camera combines optics and electronics to capture and process images. The essential components of a digital camera
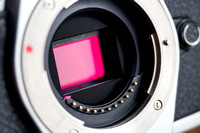 include the lens, which focuses incoming light, and the sensor, which is typically made of silicon and contains a grid of photosites or pixels.
Each pixel on the sensor is sensitive to light and capable of converting the incoming photons into electrical signals. The number of pixels on a sensor determines the camera's resolution, with more pixels resulting in higher resolution and more detailed images. Digital cameras, especially DSLRs and mirrorless cameras, can have millions or even tens of millions of pixels on their sensors.
Once the light passes through the lens and reaches the sensor, the photosites generate electrical signals proportional to the intensity of light they receive. The camera's image processor then processes these electrical signals, which converts them into digital data. This digital data is represented as numerical values corresponding to each pixel's color and brightness levels.
The camera's processor also handles other tasks, such as applying white balance, noise reduction, and image compression, before the final image is saved as a file, usually in JPEG or RAW format. JPEG files are compressed and processed in-camera, while RAW files retain more image data and require post-processing in software to fine-tune the final output.
In summary, a digital camera focuses light through the lens onto a silicon-based sensor composed of millions of photosites or pixels. Each pixel detects light and generates electrical signals, which the camera's image processor processes to create a digital image file. This intricate process enables digital cameras to capture high-resolution, detailed photographs that can be easily shared and edited.
Natural Daylight Lighting Guidelines:
Situation: Direct Sunlight Subject Position: Place the subject with their back to the sun or at an angle to avoid squinting.
Tips & Techniques: Use a reflector to bounce sunlight back onto the subject, filling in shadows. A diffuser can also be used to soften harsh light. Landscape Guidelines: Shoot during the golden hour, when the sun is low in the sky, for warm colors and long shadows. Use a polarizing filter to enhance the sky and reduce glare.
Situation: Overcast Day Subject Position: Position the subject anywhere, as the clouds will diffuse the light evenly.
Tips & Techniques: Use a reflector to add directional light or remove shadows if necessary.
Landscape Guidelines: Overcast days are ideal for capturing vibrant natural colors, as the diffused light minimizes harsh shadows and contrast.
Situation: Open Shade Subject Position: Place the subject within the shaded area, facing the open sky or a brighter area.
Tips & Techniques: Use a reflector to bounce light into the subject's face and add catchlights to their eyes.
Landscape Guidelines: Look for areas of dappled light to create exciting patterns and textures within the landscape.
Situation: Golden Hour Subject Position: During the Golden hour position, the subject faces the warm sunlight directly or at an angle for the best possible light to cover the subject.
Tips & Techniques: Use a reflector or fill flash to balance the light on the subject's face and reduce shadows.
Landscape Guidelines: The golden hour provides warm, directional light that enhances colors, textures, and depth in landscape photos. Look for interesting shadows and backlit scenes to add visual interest.
Situation: Blue Hour Subject Position: Position the subject in a well-lit area, as the overall light levels will be low.
Tips & Techniques: Use a tripod and a slower shutter speed to capture more light, and consider using artificial light sources or fill flash to illuminate the subject.
Landscape Guidelines: The blue hour offers a fantastic, moody atmosphere, perfect for capturing cityscapes and landscapes with artificial lights. Use a tripod and longer exposures to capture the available light and create a sense of motion.
Adjust these guidelines based on your specific shooting conditions and desired outcome. Experimenting with lighting scenarios and tools will help you develop your photography skills and create unique, compelling images.
Artificial Lighting Techniques:
Key Light: The key light is the primary light source in a scene. It is typically positioned at a 45-degree angle in front of the subject,
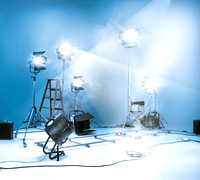 slightly above their eye level. The key light defines the subject's shape and form and sets the overall tone of the scene.
Backlight: The backlight is placed behind the subject, often at a higher angle. It separates the subject from the background by creating a subtle rim of light around the subject's edges. This adds depth and dimension to the scene and helps the subject stand out against the background.
Fill Light: The fill light is positioned opposite the key light, at the same level or slightly lower. Its purpose is to fill in the shadows created by the key light, reducing contrast and providing a more even, balanced illumination.
Side Light: A side light is placed at a 90-degree angle to the subject, illuminating one side of their face or body while leaving the other side in shadow. This lighting position can create a dramatic, moody effect or emphasize the texture and shape of the subject.
Front Light: Front light is positioned directly in front of the subject, evenly illuminating their face or body without casting significant shadows. This lighting position is often used for a flat, uniform look, which is commonly seen in product photography and some portrait styles.
Examples of Artificial Light Setups:
Single-Light Setup: In a single-light setup, the key light is used as the only light source, creating a high-contrast scene with solid shadows. This setup is ideal for dramatic or moody portraits and can be softened by adding a reflector to bounce light back onto the subject.
Two-Light Setup: In a two-light setup, the key light is combined with either a fill light or a backlight. The fill light helps to soften shadows and create a more balanced look, while the backlight adds depth and separation between the subject and the background. This setup is versatile and can be used for various purposes, including portraits, product photography, and interviews.
Three-Light Setup: In a three-light setup, the key light, fill light, and the backlight are used to create a balanced and visually appealing scene. This setup provides complete control over the lighting environment and is ideal for creating professional-quality images in various genres, such as portraiture, fashion, and commercial photography.
By understanding the different positions and effects of artificial lights, you can create a wide range of lighting setups to achieve the desired look and mood for your photography or filmmaking projects. In addition, experimenting with different light sources, positions, and intensities will help you develop your skills and create compelling visuals.
Flash Lighting Techniques:
Using a flash for lighting can significantly enhance your photography by providing additional light, freezing motion, or filling in shadows when needed. Here's a guide to help you understand the fundamentals of using a flash and various techniques to improve your images:
Direct Flash: Direct flash is the most basic technique, where the flash is pointed directly at the subject, which can create a harsh and flat look with strong shadows behind the subject. You can use a diffuser or bounce the flash off a nearby surface to soften the light.
Bounce Flash: Bouncing the flash involves angling the flash head to reflect the light off a surface, such as a wall or ceiling, before it reaches the subject, which creates a softer, more diffused light that mimics natural light and reduces harsh shadows. The surface you bounce the flash off will affect the color and quality of the light, so choose a neutral-colored surface for the best results.
Fill Flash: Fill flash is used to fill in shadows on a subject when a vital light source, such as the sun, creates harsh shadows on their face. You can brighten the shadow areas using a lower flash power without overpowering the existing light.
Off-Camera Flash: Using an off-camera flash allows you to position the flash independently from the camera, providing more control over the direction and quality of the light. You can trigger off-camera flashes using a cable, wireless triggers, or your camera's built-in flash (if it supports wireless flash control).
Multiple Flash Setup: Two or more flashes are used together to create a more complex and controlled lighting environment in a multiple flash setup. You can use a combination of direct, bounced, and off-camera flashes to achieve the desired look. Flashes can be synced together using wireless triggers or one flash as a "master" that triggers the other "slave" flashes.
High-Speed Sync (HSS): High-Speed Sync allows you to use flash at shutter speeds faster than your camera's average flash sync speed, which is helpful in freezing motion or balancing flash with bright ambient light. To use HSS, your camera and flash must support this feature.
Rear-Curtain Sync: Rear-curtain sync is a technique that fires the flash at the end of the exposure rather than at the beginning, creating exciting motion blur effects, where the subject appears sharp but has a trail of motion behind them.
Tips for Flash Photography:
- Always be aware of your flash's power and recycling time. Using a flash at full power will take longer to recycle, meaning you may miss shots if you're shooting in rapid succession.
- When using bounce flash, the larger the surface you bounce off, the softer the light will be.
- To control and shape the light, experiment with different flash modifiers, such as diffusers, softboxes, and snoots.
- Remember that the distance between the flash and the subject affects the quality of the light. Moving the flash closer will create a softer light, while moving it farther away will create harsher shadows.
By understanding and mastering these flash photography techniques, you can create various lighting effects and improve the quality of your images in challenging lighting conditions.
Conclusion:
The journey of photography and lighting is a profoundly enriching and transformative experience that has evolved over the centuries. From the early beginnings of capturing light through camera obscura to modern-day techniques with advanced digital cameras and lighting equipment, photography has consistently been an art form intimately tied to the beauty of light and shadow. I am continually amazed by the ingenuity and creativity of photographers throughout history and their ability to master the language of light.
As a new photographer embarking on this incredible journey, embracing the rich history of photography and the techniques passed down through generations is essential. The art of photography encompasses capturing moments, preserving memories, and communicating emotions and stories through the interplay of light and shadow. To excel in this craft, you must learn to observe and understand the nuances of lighting, experiment with different techniques, and discover a unique style that resonates with your vision.
As you continue to hone your skills, draw inspiration from the great photographers and artists of the past while always looking forward to the possibilities the future holds. With every new image you create, you become a part of the ongoing story of photography, contributing to a legacy that spans centuries and transcends cultural and geographical boundaries.
I encourage you to embrace this journey with an open heart and insatiable curiosity. Explore the world around you with a keen eye for light, shadow, and composition, and never cease learning and growing as an artist. Remember that photography is about capturing an image, the essence of a moment, and the emotions it evokes.
In the words of the renowned photographer Ansel Adams, "You don't take a photograph. You make it." So go forth, my fellow photographers, and make your mark on the world through the captivating language of light and shadow. May your journey be filled with discovery, growth, and endless inspiration as you capture life's beauty and complexity through your camera's lens.
A Short Story About a Young Photographer:
As the sun dipped below the horizon, painting the sky in a swirl of oranges and purples, Samantha gazed at the breathtaking view through the lens of her camera. She snapped a picture, capturing the precise moment when the sun kissed the horizon goodbye. The young photographer had always been captivated by the interplay of light and shadow in her images, but her fascination had intensified in recent months.
An old book she had discovered in a dusty corner of a used bookstore had piqued her interest. Its pages were filled with the rich history of photography and the pioneers who had brought the art to life. Samantha was enchanted by the stories of those who had come before her, manipulating light and shadow to immortalize fleeting moments.
She spent hours poring over the book, her fingers tracing the delicate black-and-white images of long-forgotten photographers. Samantha became obsessed with understanding the principles that guided these masters of their craft. She longed to replicate their techniques and produce images that would stand the test of time, just as theirs had.
With her camera and the knowledge she gleaned from the book, Samantha embarked on a journey to rediscover the lost art of light and shadow:
- She traveled to historic sites, capturing sunlight's intricate patterns on ancient stone.
- She ventured into the depths of dense forests, where dappled light danced through the trees, casting eerie shadows on the forest floor.
- Her quest took her to the edges of the world, where the interplay of light and shadow was at its most dramatic.
In the far reaches of the Arctic, Samantha stood on the edge of a frozen lake, her breath frosting in the frigid air. The sun hung low in the sky, casting long, spindly shadows across the ice. The world seemed suspended in a perpetual twilight, with the boundaries between light and darkness blurred beyond recognition. The scene's beauty was almost too much for Samantha's heart to bear, and she trembled with excitement as she raised her camera to capture the sight.
As she clicked the shutter, Samantha experienced a profound connection with the photographers who had come before her. In that instant, she felt the weight of history pressing down her shoulders, and a shiver ran down her spine. The young photographer understood that she was part of a legacy stretching back through the centuries and embraced her role in preserving the magic of light and shadow.
Samantha's journey had taken her to the farthest reaches of the world, but in the end, it was not the breathtaking landscapes or the ancient architecture that had captivated her. Instead, it was the knowledge that she was part of a long line of artists who had devoted their lives to capturing the beauty of light and shadow. Samantha felt a sense of duty to carry on these pioneers' legacy and share their wisdom with future generations.
As she explored the world, camera in hand, Samantha dedicated herself to understanding the elusive art of light and shadow. She sought to master the techniques of the past and to innovate new methods for capturing the beauty of the world around her. In doing so, she honored the photographers who had come before her, ensuring their legacy would live on in the images she created and the knowledge she passed on to those who would follow in her footsteps.
